Creating a workcenter in peoplesoft is a pretty easy process. In this post I will teach you a step by step process on how to configure a workcenter in peoplesoft. I completed these steps using PeopleSoft Financials 9.2 with PeopleTools 8.55.15.
1. Configure Navigation Collection
PeopleTools > Portal > Portal Utilities > Navigation Collections
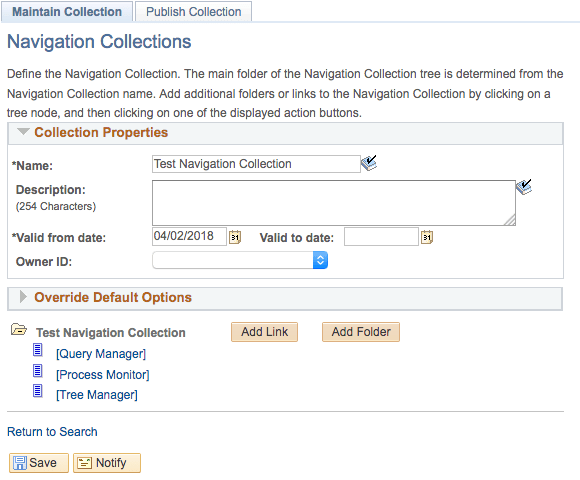
- Click Add Collection
- Enter a name for your navigation collection
- Add Links to Menu Items and Folders as needed for your navigation collection
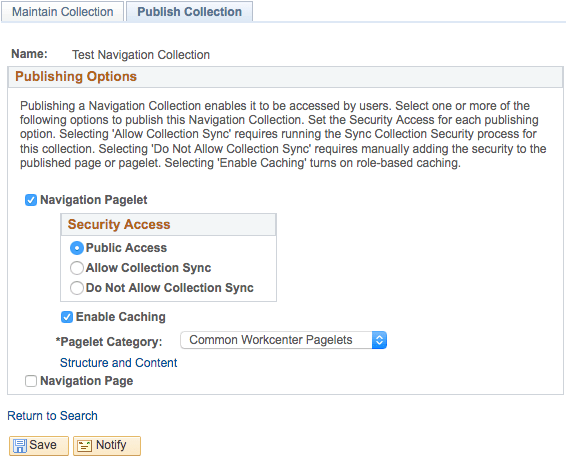
- Click Publish Collection Tab
- Click Navigation Pagelet Checkbox
- Select category for pagelet in the Pagelet Category Dropdown (Common WorkCenter Pagelets is what I selected)
- Click Save
2. Configure WorkCenter Dashboards
PeopleTools > Portal > WorkCenter > Manage WorkCenter Dashboards
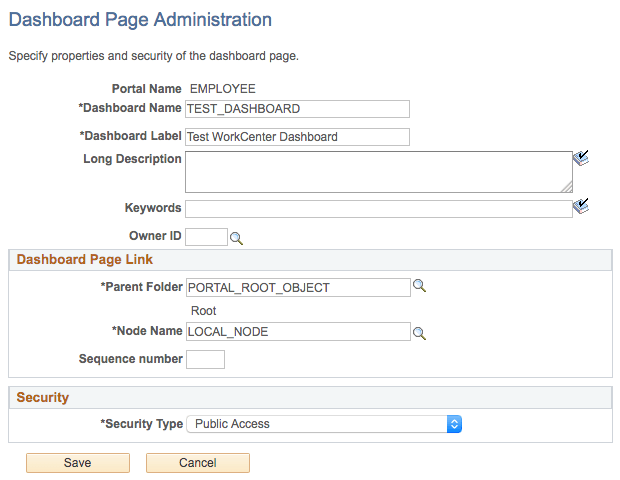
- Click Create new WorkCenter dashboard page (at the bottom of the page)
- Enter the name for your dashboard in the Dashboard Name field (this isn’t actually the name displayed)
- Enter the label for your dashboard in the Dashboard Label field (this is what is displayed as the name)
- Select the parent folder from the Parent Folder field (this is the menu item your users will access your workcenter from)
- Click Save
-
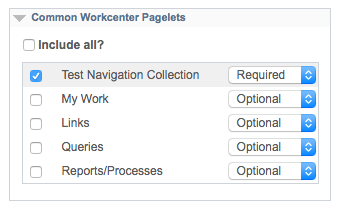 Click the Pagelets button next to your new workcenter dashboard
 - Click the checkbox next to the Navigation Collection you configured in step 1 above (it is in the category you selected when you created the navigation collection)
- Select the Required Option
- Click Save
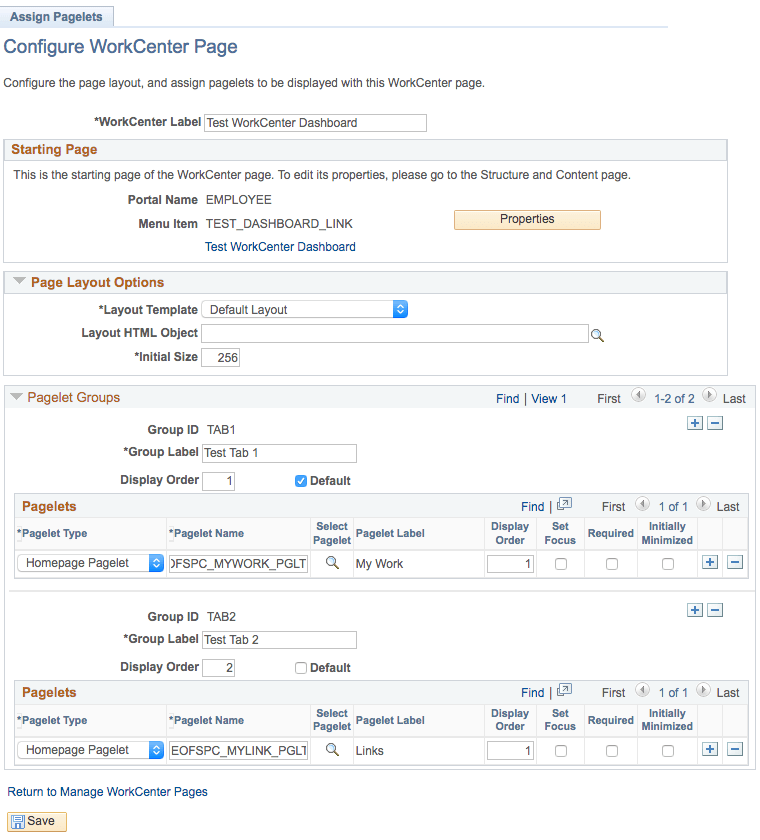
3. Configure WorkCenter Page
PeopleTools > Portal > WorkCenter > Manage WorkCenter Pages
- Click Create new WorkCenter page (at the bottom of the page)
- Select WorkCenter dashboard page and choose the workcenter dashboard you configured in step 2 above
- Enter a pagelet group ID and label (these will be the tabs on the left side of your workcenter)
- Add Pagelets to your group(s) (common workcenter pagelets are Links, My Work, Queries, and Reports/Processes)
- Click Save
4. Configure WorkCenter Pagelets
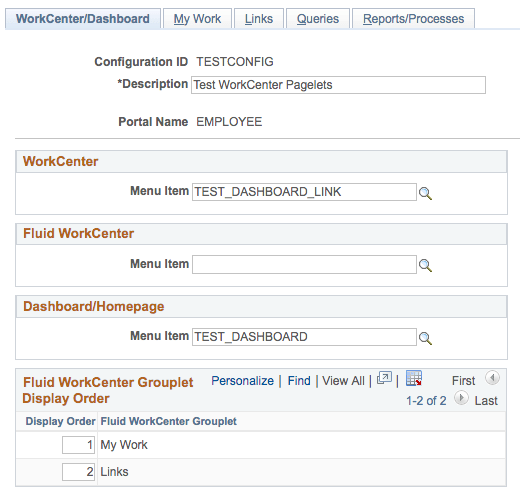
Enterprise Components > WorkCenter/Dashboards > Configure Pagelets
- Click Add a New Value
- Enter a Configuration ID
- Enter a Description
- Select the WorkCenter Menu Item of the workcenter page you configured in step 3 above
- Select the Dashboard/Homepage Menu Item of the workcenter dashboard you configured in step 2 above
- Click Save
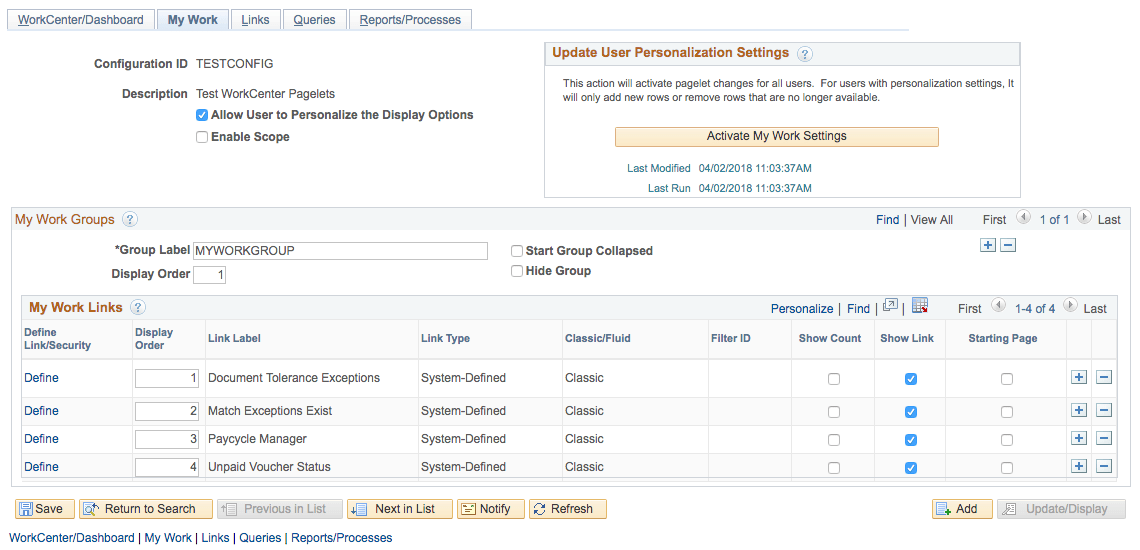
You can now configure My Work, Links, Queries, and Reports/Processes by selecting the proper tab. A very important hint is that after clicking save on the page for configuring each pagelet you must also click the Activate Settings button.
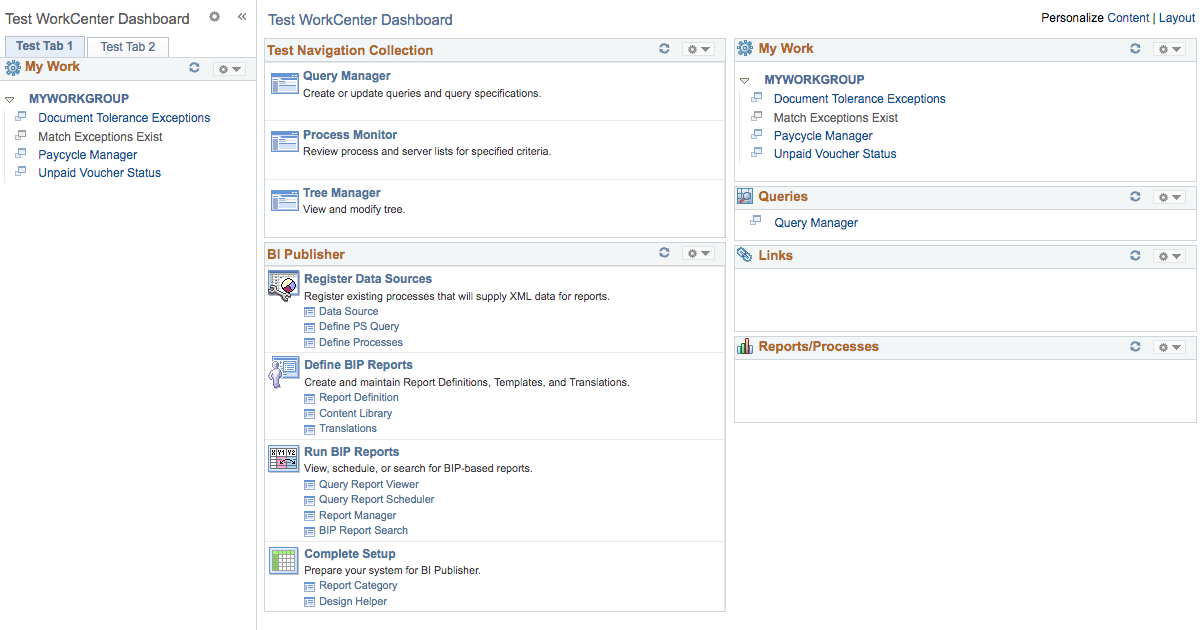
PeopleSoft WorkCenter
You should now be able to navigate to your newly created peoplesoft workcenter using the menu item you configured in step 2 above.
 I hope this step by step guide on how to configure a workcenter in peoplesoft has been useful to you. For more detailed information about peoplesoft I highly recommend you buy a copy of PeopleSoft PeopleTools Tips & Techniques.